Add the standalone player to a TypeScript project
In recent years, TypeScript has become the preferred choice for many developers and organizations. This growth can be attributed to several factors.
The language is a superset of JavaScript. It introduces static typing that enhances code quality and catches errors during compile time rather than at runtime. TypeScript also offers intelligent code completion, navigation, and refactoring capabilities to boost developer productivity. Additionally, it supports and transpiles modern JavaScript or ECMAScript 6 (ES6) features to ensure compatibility with older browsers and environments. Lastly, with solid backing from Microsoft, TypeScript has established itself as a robust and scalable solution that provides stability and continuous improvement.
This guide describes using TypeScript to integrate the standalone player and its plugins into your development projects.
info
The @flowplayer/player npm package uses TypeScript version 5.4.2.
Benefits of TypeScript usage
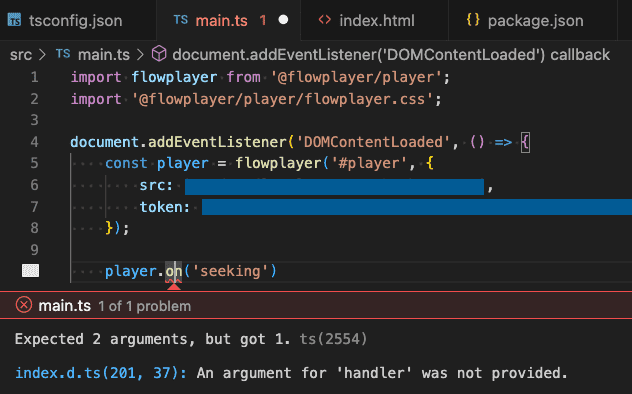
The Wowza Flowplayer library and plugins provide full TypeScript support to enhance your development experience. All plugins and entry files include type declaration files that make it easier to use our libraries while taking advantage of these TypeScript features:
-
Type safety:
You get accurate type information to improve type checking and type safety when working with our player. This allows TypeScript to catch errors at compile time rather than runtime. Types are self-documenting, for example, clarifying what arguments functions expect and what they return.

-
IntelliSense capabilities:
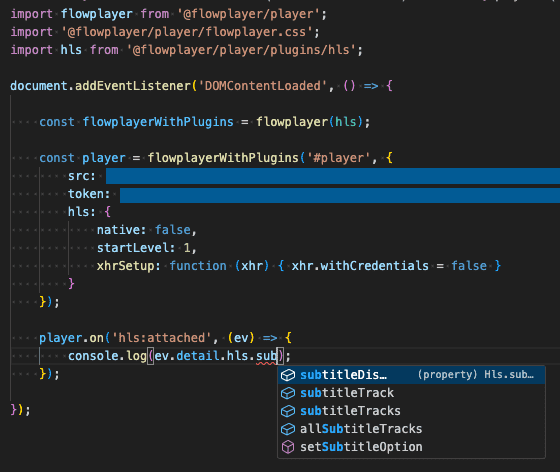
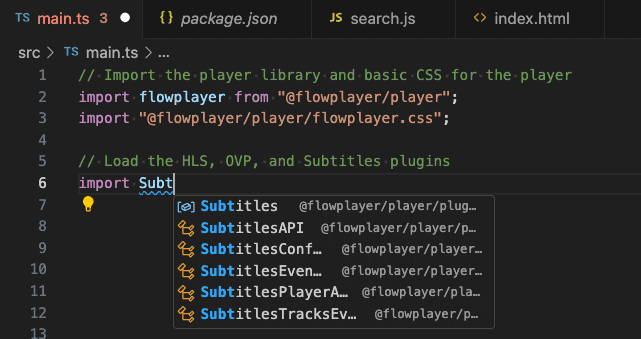
When integrating our libraries, you can take advantage of autocompletion or IntelliSense features to see what properties or methods are available in your Integrated Development Environment (IDE). Inline documentation makes it faster to work with our player and plugins.

-
Interoperability:
You can smoothly integrate our plugins without guessing how to incorporate them along with the player. TypeScript understands how to import and use these libraries without additional configuration steps or research.

Before you start
Before you start working with this guide, we make the following assumptions and recommendations:
- You have basic knowledge of JavaScript and TypeScript.
- You're familiar with the ECMAScript Module (ESM) approach of handling JavaScript modules.
- You have Node.js and Node Package Manager (npm) installed on your machine.
- You're using Visual Studio Code as your IDE.
- Review the Token configuration section. To authorize the player, you need to configure it with your token.
- When working with media from Wowza Video, you must use the Wowza Video Platform Integration plugin.
info
This guide uses Vite to handle the bundling and development server. If you use this approach, make sure your version of Node.js is compatible with your Vite version. Vite requires Node.js version 18+ or 20+. You can also use another module bundler, such as Webpack, to simplify managing dependencies, importing styles, and optimizing the build process.
1. Set up your TypeScript project
This section assumes you're creating a new TypeScript project. However, you can skip these steps and continue with the next section if you're working with an existing project.
-
Initialize a new Node.js project by installing
Vite
and the TypeScript package:
npm create vite@latest flowplayer-ts-project -- --template vanilla-tsWhen including the
--templateflag in the previous step, you're also setting up the TypeScript configuration by creating a tsconfig.json file in the root of your project. This file should be configured for ESM. The configuration may look similar to this:tsconfig.jsonempty-tab{ "compilerOptions": { "target": "ES2020", "useDefineForClassFields": true, "module": "ESNext", "lib": ["ES2020", "DOM", "DOM.Iterable"], "skipLibCheck": true, /* Bundler mode */ "moduleResolution": "bundler", "allowImportingTsExtensions": true, "isolatedModules": true, "moduleDetection": "force", "noEmit": true, /* Linting */ "strict": true, "noUnusedLocals": true, "noUnusedParameters": true, "noFallthroughCasesInSwitch": true }, "include": ["src"] }info
With this specific TypeScript configuration, you can automatically import the player plugins by name instead of typing out the exact path.
2. Install Wowza Flowplayer
We suggest installing the player into your TypeScript project using npm. The player assets exist on npm under the @flowplayer/player package. The @flowplayer/player npm package already includes .d.ts files so you don't have to separately install the TypeScript @types definitions.
-
Move to the current directory for the project you just installed:
cd flowplayer-ts-project -
To install the latest stable build for Wowza Flowplayer, run the following:
npm install @flowplayer/player
3. Update your project
Next, update your project and replace your TypeScript and HTML files. This step initializes the player with its configuration values and adds the HTML elements needed to display the player in a web browser.
-
Update your
src/main.ts
file by importing the player library, adding the basic CSS for the player, and initializing the player:
main.tsempty-tab
// Import the player library and basic CSS for the player
import flowplayer from "@flowplayer/player";
import "@flowplayer/player/flowplayer.css";

// Initialize the player
document.addEventListener("DOMContentLoaded", () => {

  const player = flowplayer("#player", {
    // Add placeholder for the media source URL
    src: "[video-source-url]",
    // Remove the token if running over localhost
    token: "[your-player-token]",
    title: "Elephants Dream",
    description: "Experimental short film produced by Blender Foundation",
  });

});
info
For more information about the required
tokenvalue, see Token configuration. If you need information about thesrcproperty, see the Video source section. -
To render the player on a web page, add the following to the
index.html
file at the root of your project:
index.htmlempty-tab
<!DOCTYPE html>
<html lang="en">
  <head>
    <meta charset="UTF-8">
    <meta name="viewport" content="width=device-width, initial-scale=1.0">
    <title>Flowplayer TS integration</title>
  </head>
  <body>
    <h1>Flowplayer TypeScript integration</h1>
    <div id="player" style="width: 800px;"></div>
    <script type="module" src="/src/main.ts"></script>
  </body>
</html>
4. Add your plugins
In this section, we add three different plugins and modify the project you created in the previous Update your project section. All of the plugins include full TypeScript support.
We need to work with the HLS plugin because it's required for streaming content in the .m3u8 format. We also import the Wowza Video Platform Integration (OVP) plugin to include video created in Wowza Video, as well as the HTML Subtitles plugin to add the display of WebVTT subtitles. For information about configuration properties and details, check the documentation for each plugin.
-
Update the
main.ts
file by also importing the
HLS
,
OVP
, and
Subtitles
plugins:
main.tsempty-tab
import OVP from "@flowplayer/player/plugins/ovp";
import HLS from "@flowplayer/player/plugins/hls";
import Subtitles from "@flowplayer/player/plugins/subtitles";
info
Loading the Wowza Video Platform Integration (OVP) plugin allows you to use a video ID from a Wowza Video media source. Since the platform videos default to HLS, you must also load the HLS plugin to add support for HTTP Live Streaming (HLS).
-
In the
main.ts
file, initialize your
flowplayerinstance with these same plugins:main.tsempty-tabconst flowplayerWithPlugins = flowplayer(HLS, OVP, Subtitles); -
Next, set up the video player, add your configurations options, and listen to the
HLS.events.ATTACHEDevent to add some logic. Here's the updated solution:main.tsempty-tab// Import player library and basic CSS for player import flowplayer from "@flowplayer/player"; import "@flowplayer/player/flowplayer.css"; // Load HLS, OVP, and Subtitles plugins import HLS from "@flowplayer/player/plugins/hls"; import OVP from "@flowplayer/player/plugins/ovp"; import Subtitles from "@flowplayer/player/plugins/subtitles"; // Wait for DOM to load document.addEventListener("DOMContentLoaded", () => { // Create player instance that integrates HLS, OVP, Subtitles plugins const flowplayerWithPlugins = flowplayer(HLS, OVP, Subtitles); // Set up video player and add configuration options const player = flowplayerWithPlugins("#player", { // Specify video ID from the Wowza Video platform src: "b85a80a9-e3f1-4b33-a3a0-d58db6d34376", // Remove token if running over localhost token: "[your-player-token]", poster: "http://d2zihajmogu5jn.cloudfront.net/elephantsdream/poster.png", title: "Elephants Dream", description: "Experimental short film produced by Blender Foundation", hls: { // Forces use of hls.js for HLS streaming instead of browser's native implementation native: false, startLevel: 1 }, subtitles: { // Add array of subtitle tracks in different languages from WebVTT URLs tracks: [ { src: "https://raw.githubusercontent.com/videojs/video.js/refs/heads/main/docs/examples/elephantsdream/captions.en.vtt", label: "English", id: "English-en", default: true, crossorigin: "anonymous" }, { src: "https://raw.githubusercontent.com/videojs/video.js/refs/heads/main/docs/examples/elephantsdream/captions.sv.vtt", label: "Swedish", id: "Swedish-sv", default : false, crossorigin: "anonymous" }, { src: "https://raw.githubusercontent.com/videojs/video.js/refs/heads/main/docs/examples/elephantsdream/captions.ru.vtt", label: "Russian", id: "Russian-ru", default : false, crossorigin: "anonymous" } ] } }); // Listen for ATTACHED event, triggered when HLS media is attached to player player.on(HLS.events.ATTACHED, (ev) => { console.log(ev.detail.hls.userConfig); console.log(ev.detail.hls.bandwidthEstimate); // Leverage seeking event for core player player.on(flowplayer.events.SEEKING, (ev) => { console.log(ev.type, ev); console.log(player.currentTime); }); }); });
5. Run your project locally
Use the steps in this section to run your project locally and view the player integration in your browser. For additional information about Vite production deployments, see Building for production and Deploying a static site.
-
Start the development server with the following command:
npm run dev -
To view your page in a web browser, use localhost and the port indicated in the output from the
npm run devcommand. A successful setup renders the player on the web page, plays a video source from Wowza Video, and displays subtitles within the player's user interface.